Alumiinisubstraatin prosessivirtaus
Feb 17, 2022
1. Avaaminen
Alumiinisubstraatin valmistusprosessi
1. Materiaalin - leikkausprosessi
2. Avaamisen tarkoitus
Leikkaa suuret{0}}kokoiset saapuvat materiaalit tuotantoa varten tarvittavaan kokoon
3. Materiaalien avaamista koskevat varotoimet
① Check the size of the first piece after cutting
② Pay attention to the scratches on the aluminum surface and the scratches on the copper surface
③ Pay attention to the layering and draping of the edge of the board
2. Poraus
1. Porausprosessi
Kiinnitys - Poraus - Tarkastuslautakunta
2. Poran tarkoitus
Levyn sijoittelu ja poraus auttamaan myöhempää tuotantoprosessia ja asiakkaan kokoonpanoa
3. Varotoimet porausta varten
① Check the number of drilled holes and the size of the holes
② Avoid scratches on the sheet
③ Check the drape of the aluminum surface and the deviation of the hole position
④ Check and replace the drill bit in time
⑤ Drilling is divided into two stages, one drilling: after cutting the material, the drilling is a peripheral tool hole
Toinen pora: työkalun reikä yksikössä juotosmaskin jälkeen
3. Kuiva/märkä filmikuvaus
1. Kuiva/märkä filmikuvausprosessi
Hiomalevy - filmi - valotus - kehitys
2. Kuiva/märkäfilmikuvauksen tarkoitus
Piirin tekemiseen tarvittavat osat renderoidaan levylle
3. Varotoimet kuiva-/märkäfilmikuvausta varten
① Check whether there is an open circuit in the circuit after developing
② Whether there is any deviation in the development alignment to prevent the occurrence of dry film breakage
③ Pay attention to the defective circuit caused by scratches on the board surface
④ There should be no air residue during exposure to prevent poor exposure
⑤ After exposure, keep it still for more than 15 minutes before developing
4. Happo/emäksinen etsaus
1. Happo/emäksinen etsausprosessi
Etsaus - irrotus - kuivaus - tarkastustaulu
2. Happo/emäksisen etsauksen tarkoitus
Kun olet kuvannut kuivan/märkäkalvon, säilytä tarvittava osa piiristä, poista ylimääräinen osa piirin ulkopuolelta ja kiinnitä huomiota alumiinisubstraatin syöpymiseen syövytysliuoksen vaikutuksesta happoetsauksen aikana;
3. Varotoimet happo/emäksistä syövytystä varten
① Note that the etching is not clean and the etching is excessive
② Pay attention to line width and line thickness
③ The copper surface is not allowed to be oxidized or scratched
④ The dry film should be removed cleanly
Viisi, silkki juotosmaski, hahmoja
1. Silkkipaino juotosmaski, merkkiprosessi
Silkkipaino - Esi-leivonta - Valotus - Kehitys - Hahmot
2. Tarkoitus silkkipaino juotos maski ja merkkejä
① Anti-soldering: protect the circuit that does not need to be soldered and prevent the tin from entering and causing a short circuit
② Characters: play the role of marking
3. Asiat, jotka vaativat huomiota silkki juotosmaskiin ja hahmoihin
① To check whether there is garbage or foreign matter on the board
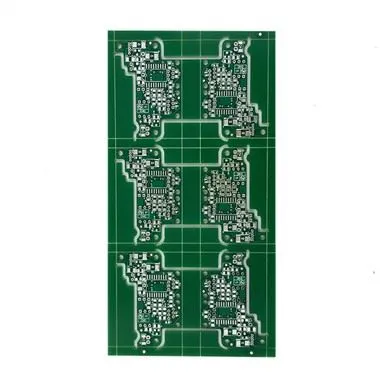
COB-alumiinisubstraatti
COB-alumiinisubstraatti
② Check the cleanliness of the stencil ③ Pre-bake for more than 30 minutes after screen printing to avoid bubbles in the lines
④ Pay attention to the thickness and uniformity of the silk screen
⑤ After pre-baking, the board should be completely cooled to avoid sticking to the film or destroying the gloss of the ink surface.
⑥ Place the ink face down during development
6. V-CUT, gong-lauta
1. V-LEIKKAUS, gong-lautaprosessi
V-CUT——Gong board——Tear off protective film——Remove Pifeng
2, V-CUT, gong-laudan tarkoitus
① V-CUT: Connect a single PCS line to the whole PNL plate cutting and leave a small part for easy packaging and removal.
② gong board: remove the excess part of the circuit board
3. V-CUT- ja gong-laudan varotoimet
① During the V-CUT process, pay attention to the size of V, incomplete edges and burrs
② Pay attention to burrs when the gong board is used, and the gong knife is skewed. Check and replace the gong knife in time.
③ Finally, avoid scratches on the board when removing the front.
Seitsemän, testi, OSP
1. Testi, OSP-prosessi
Linjatesti - Kestojännitetesti - OSP
2. Testaus, OSP:n tarkoitus
① Line test: check whether the completed line is working normally
② Withstand voltage test: check whether the completed line can withstand the specified voltage environment
③ OSP: Make the circuit better for soldering
3, testaus, OSP varotoimenpiteet
① How to distinguish between qualified and unqualified products after testing
② Placement after finishing OSP
③ Avoid line damage
Kahdeksan, FQC, FQA, pakkaus, toimitus
1. Prosessi
FQC - FQA - Pakkaus - Lähetys
2. Tarkoitus
① FQC conducts full inspection and confirmation of the product
② FQA random inspection and verification
③ Pack and ship to customers as required
3. Kiinnitä huomiota
① FQC pays attention to the confirmation of appearance during the visual inspection process and makes a reasonable distinction
② FQA really conducts random inspections to verify the inspection standards of FQC
③ To confirm the number of packages, avoid mixed boards, wrong boards and package damage 3